We will learn the appropriate method of establishing a connection between your WordPress website and AI Buster Tools through a systematic, step-by-step approach.
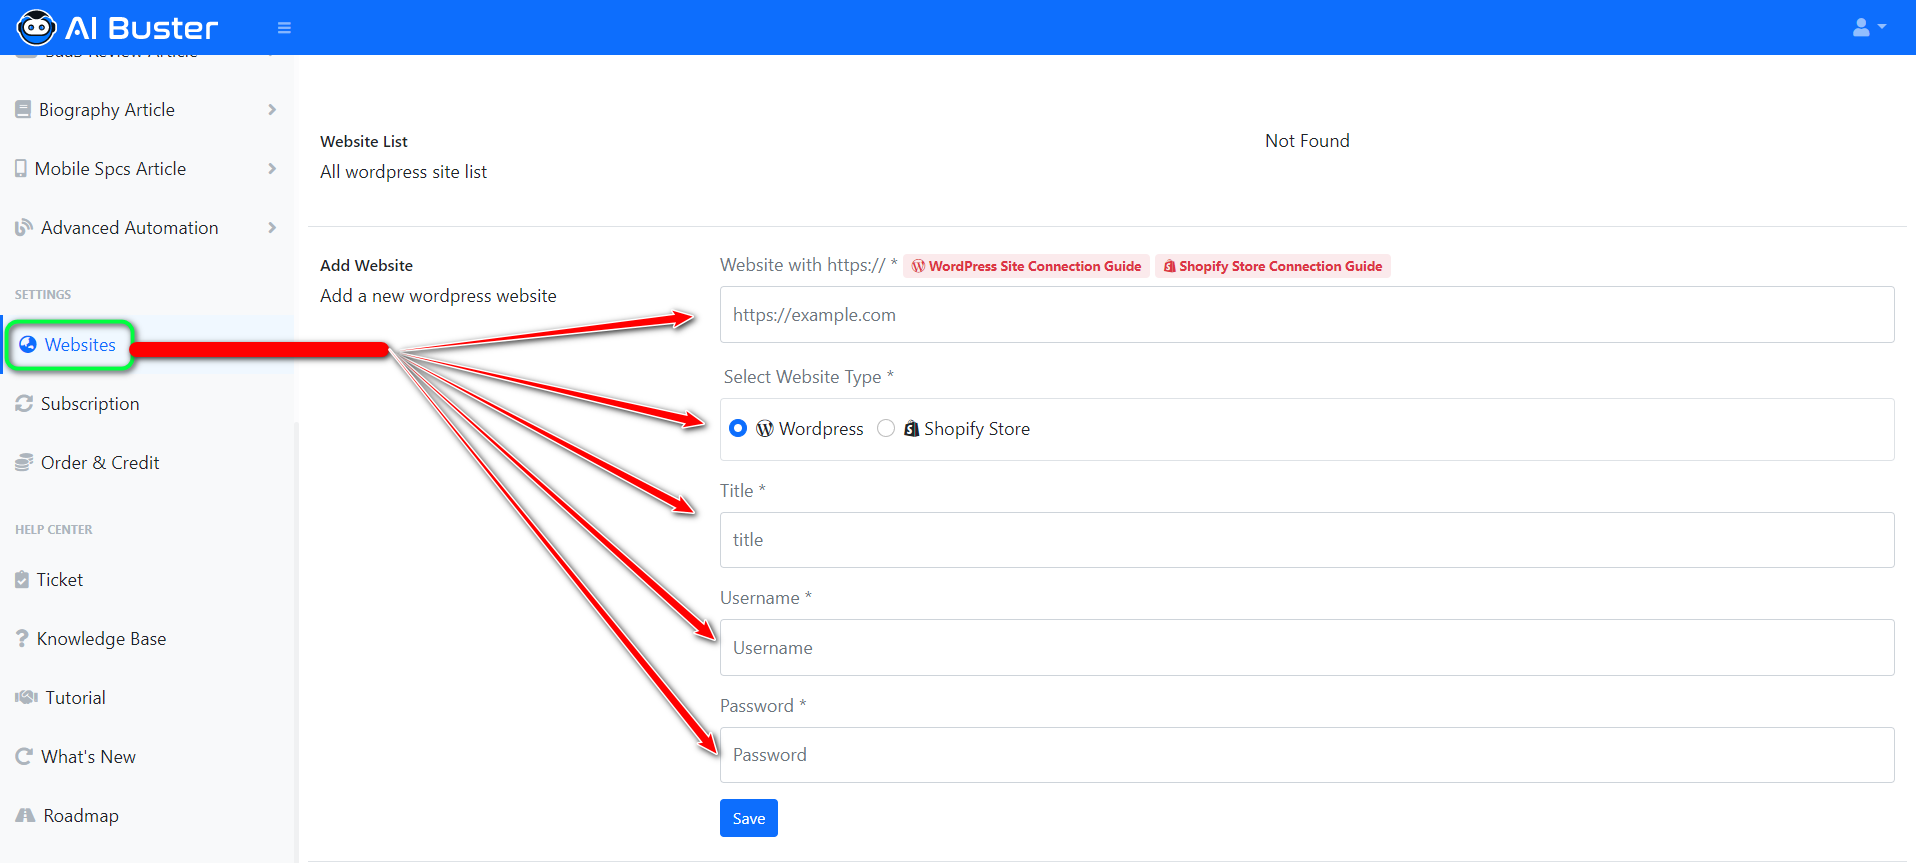
Step 1: After purchase the AI Buster plan, your next task is to add a website. To do this, first, go to the AI Buster dashboard and click on “Website”.

Step 2: Upon clicking on the website’s option, you will be presented with an interface resembling the one shown below.

Step 3: Connect your website by accessing the Add Website section.

Step 4: There will be 5 Fields appearing on the screen; you must fill them in with the required information.

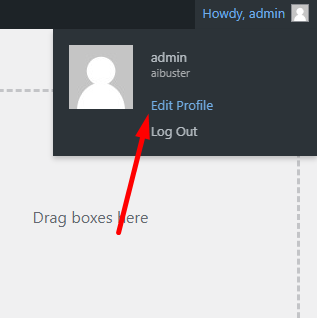
- Log into your website and go to the edit profile option.

- Now scroll down and go to the “Application Passwords” option.

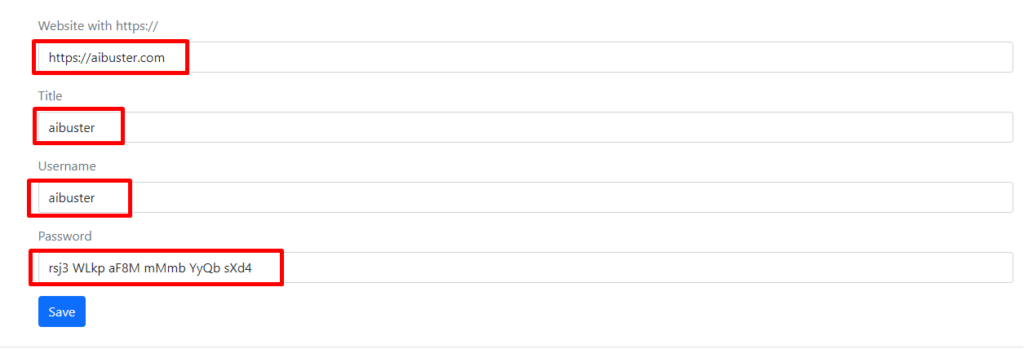
- You can create an application password by providing a name in the “new application password name” field. Once you have entered the name, click the “add new application password” button, and your app password will be generated within a few seconds. The password will appear below and resemble the following format:

- Kindly copy the entire password and navigate back to the AI Buster application. Proceed to the “Add Website” section within the AI Buster Tools website menu and complete the form in its entirety, as previously outlined.

- We are pleased to inform you that your website has been successfully integrated with our AI Buster tool. As a result, you can now select your desired module and publish individual or multiple articles on your website easily.
Note: Several individuals encountered difficulties selecting a category due to improper connection to the website. To address this issue, we recommend watching our dedicated video on connecting to our website for further clarification. We hope this will help you the right way:
Connect Your Website – Using Guideline
During the trial phase of our AI Buster tool, you may encounter a variety of complexities. If you experience any issues, please post them in our group. Our dedicated support team will immediately resolve your issues.


