AI Buster is a powerful tool that helps you easily generate articles by connecting your WordPress or Shopify website. The setup process is very simple, so you can quickly start creating content without any technical hassle. Just add your website to AI Buster, and you’re ready to go.
Let’s go over how to connect your Shopify Store with AI Buster Tools for bulk article publishing.
Step 01: First, Login to the AI Buster Auto blogging Tools
Step 02: Scroll down and click on the “Website” section.
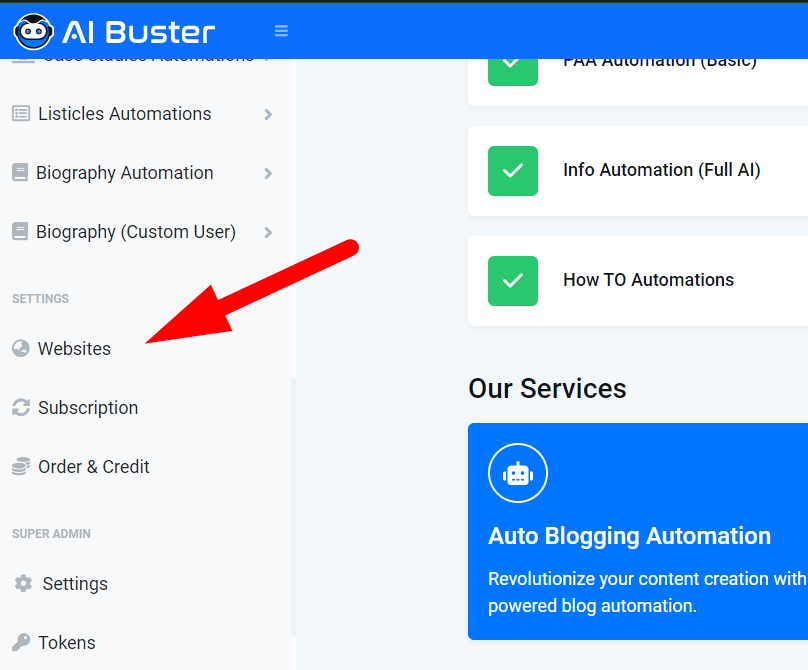
Step 03: Go to “Add Website” and you will see a box like this.
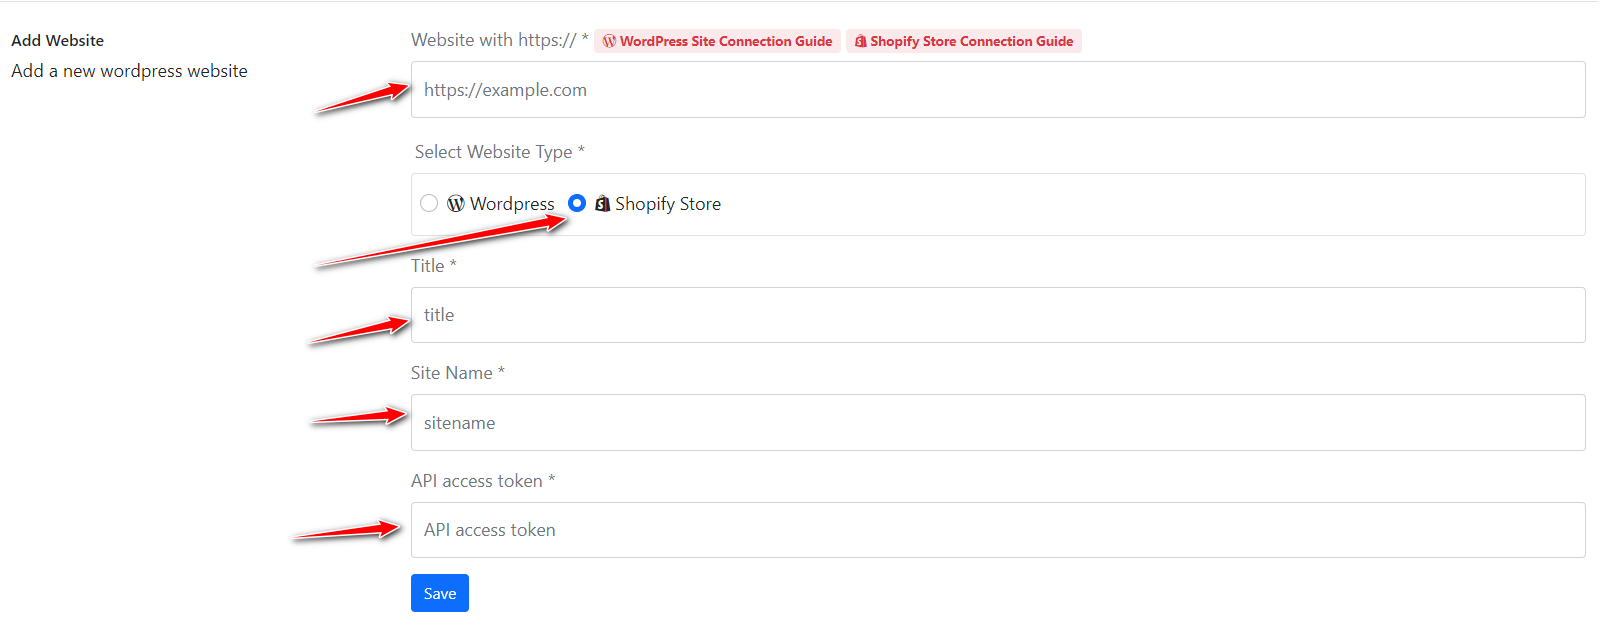
Step 04: Fill in the required data
For example:
- Website with https:// *
- Select Website Type *
- Title *
- Site Name *
- API Access Token * (Details on how to obtain a Shopify API Access Token are provided below)
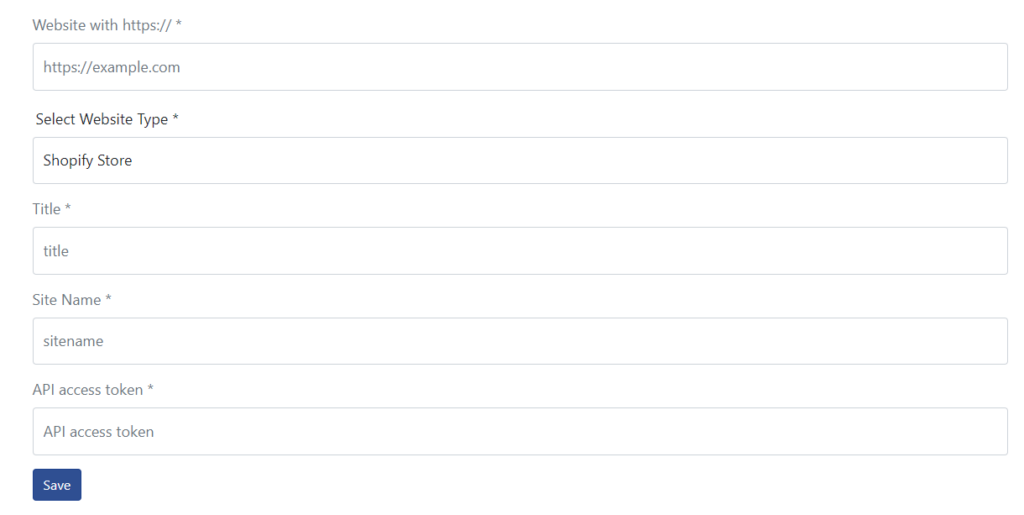
Step 05: Fill in all the correct information for your store as shown below.
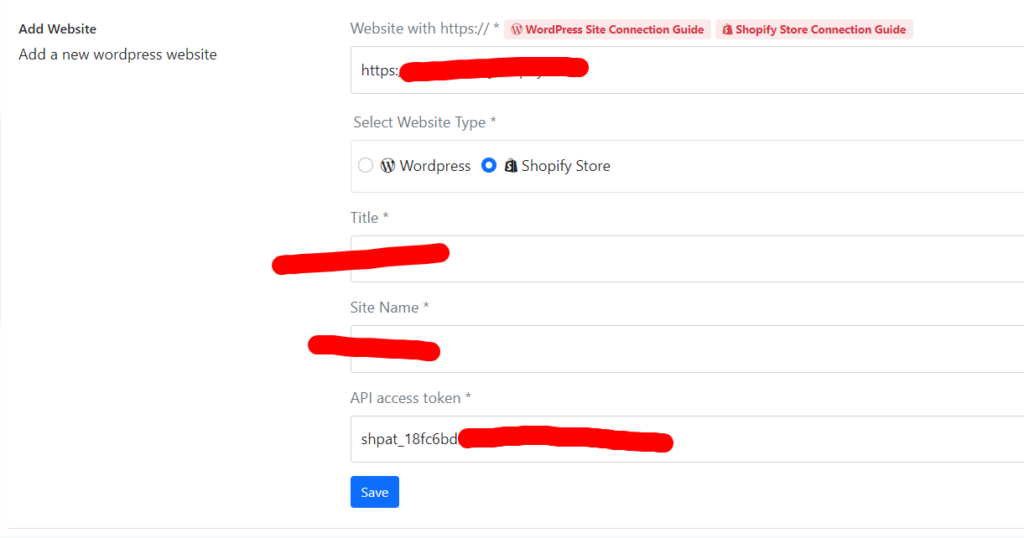
Click on the submit button.
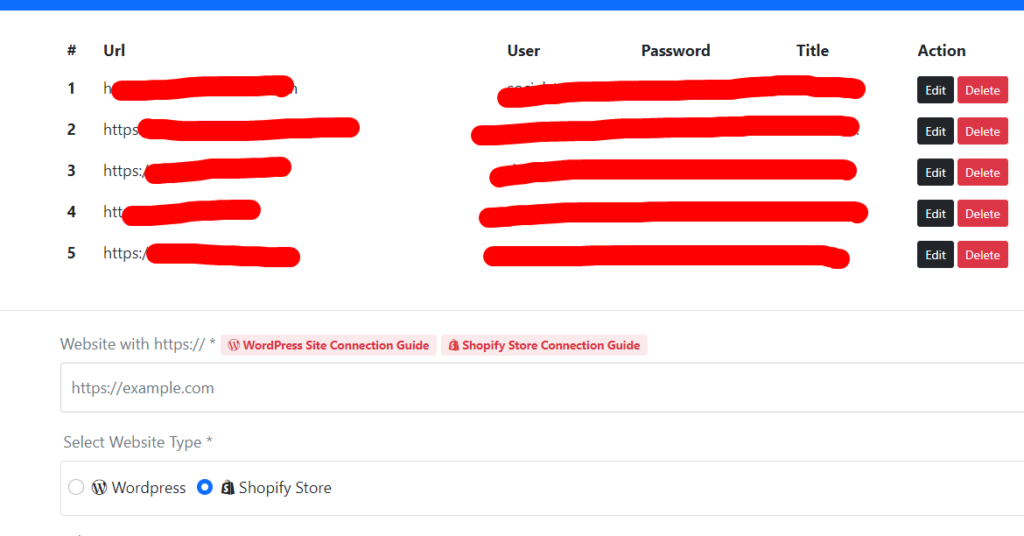
Immediately, your Shopify store will be connected with the AI Buster tools.
You will see something like the example shown below.
How To Get My Shopify API Access Token?
We have successfully connected Shopify Store with the AI Buster Tools using the Store Name and API Access Token.
Let’s see how to create your Shopify API Access Token from your Shopify store and what permissions need to be granted.
Step 01: First, we’ll log into your Shopify store.

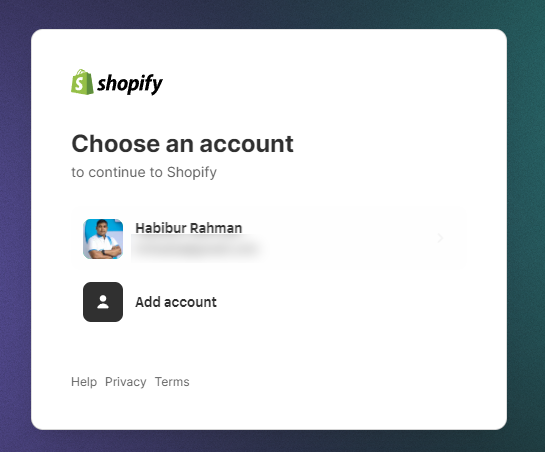
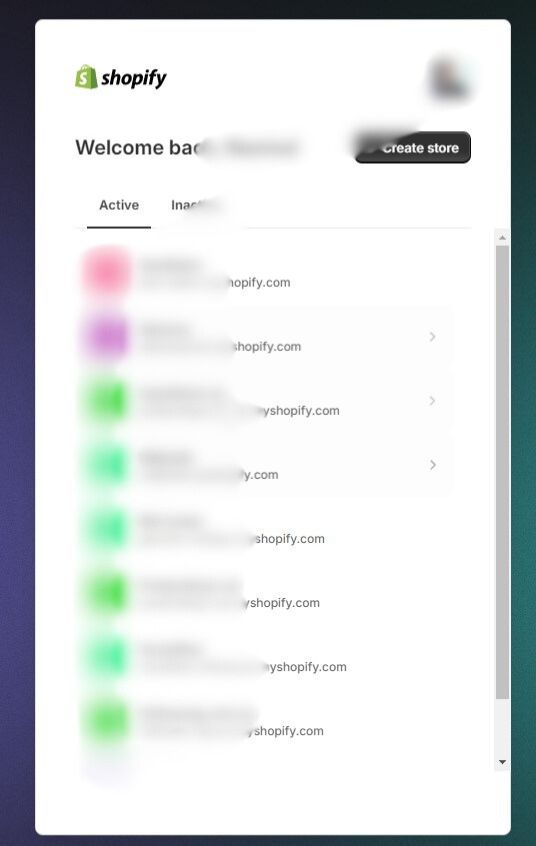
Step 02: If you have multiple stores under your email, select the store that you want to connect with our AI Buster tools.
Step 03: You have entered your targeted store. Congratulations! 🙂
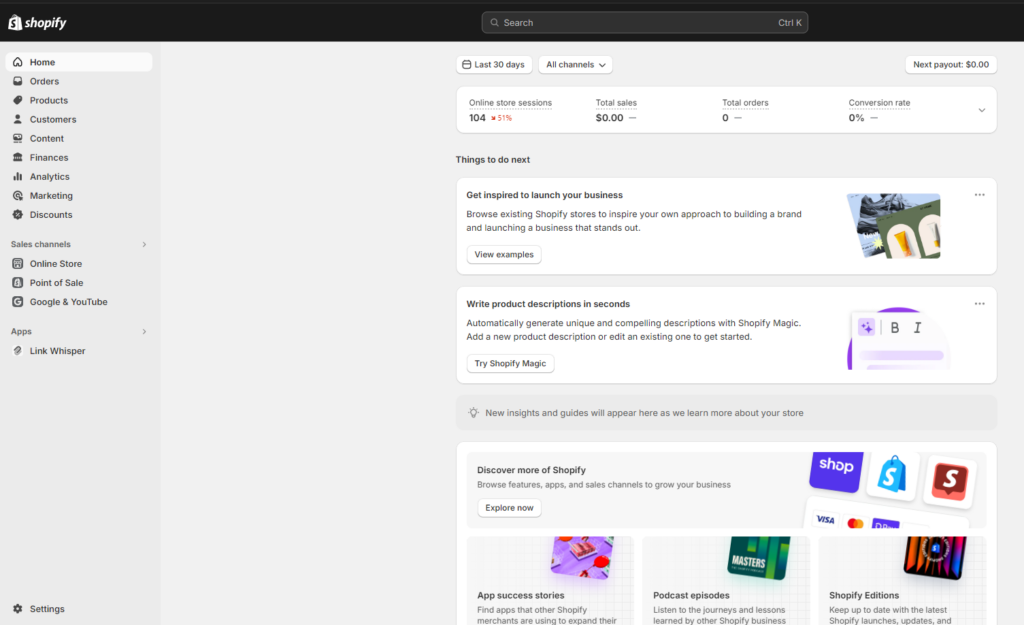
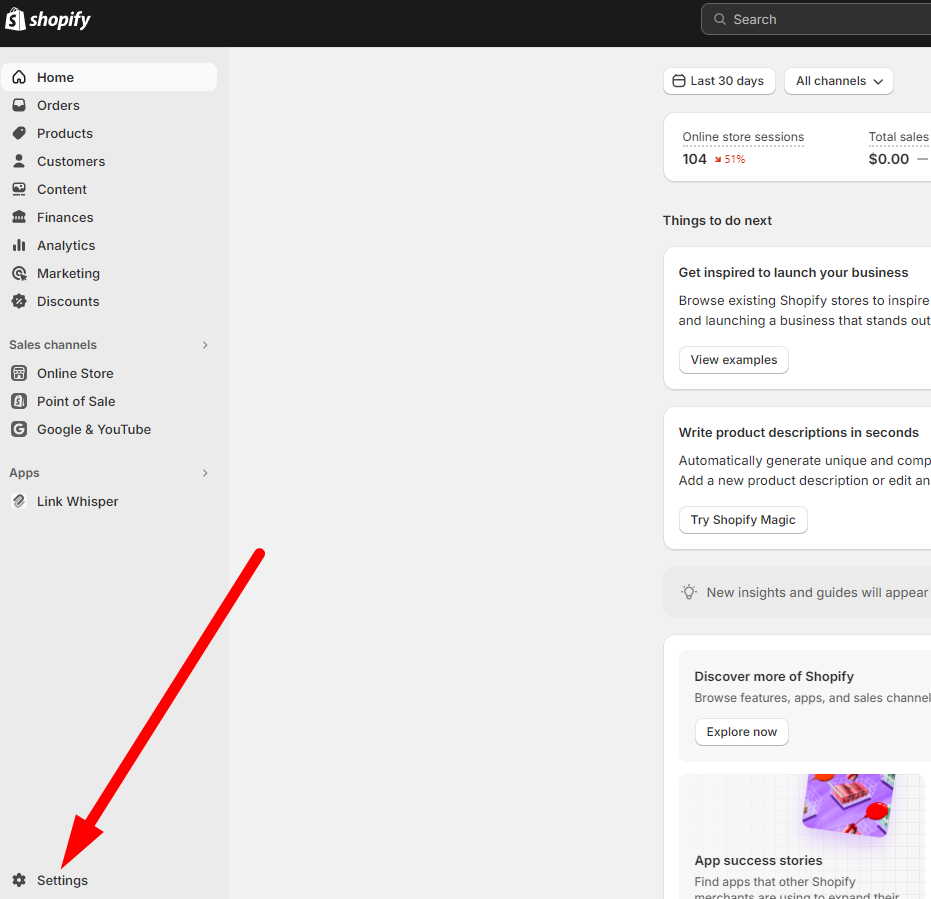
Step 04: Now, click on the Settings button located at the lower left corner.
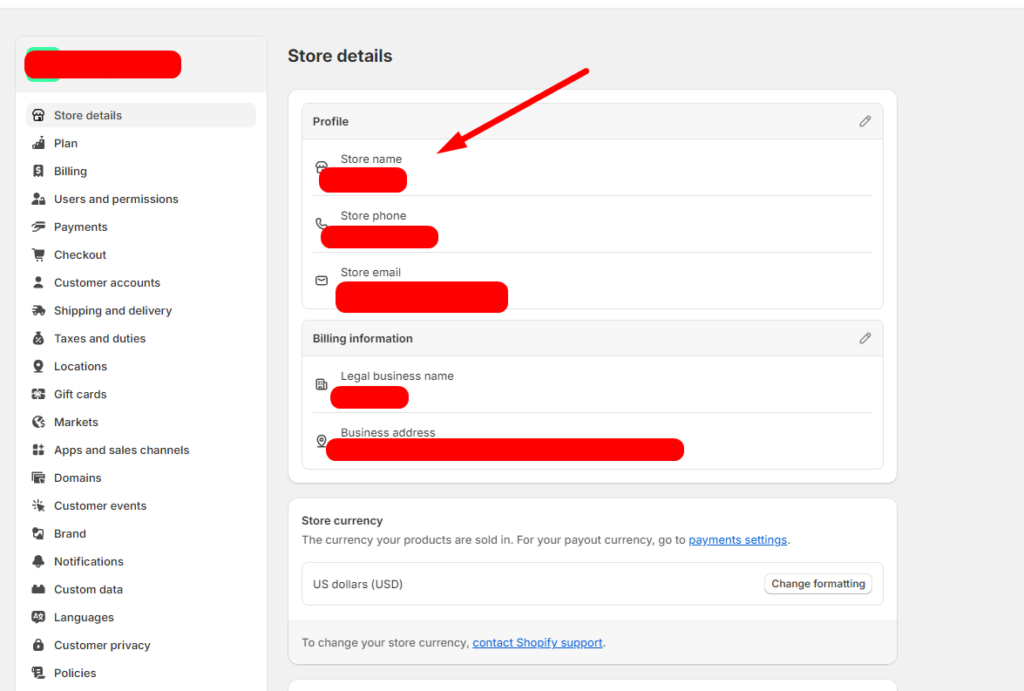
Step 05: Like the below screenshot, collect your Store Name from the Store Name section and save it in a notepad.
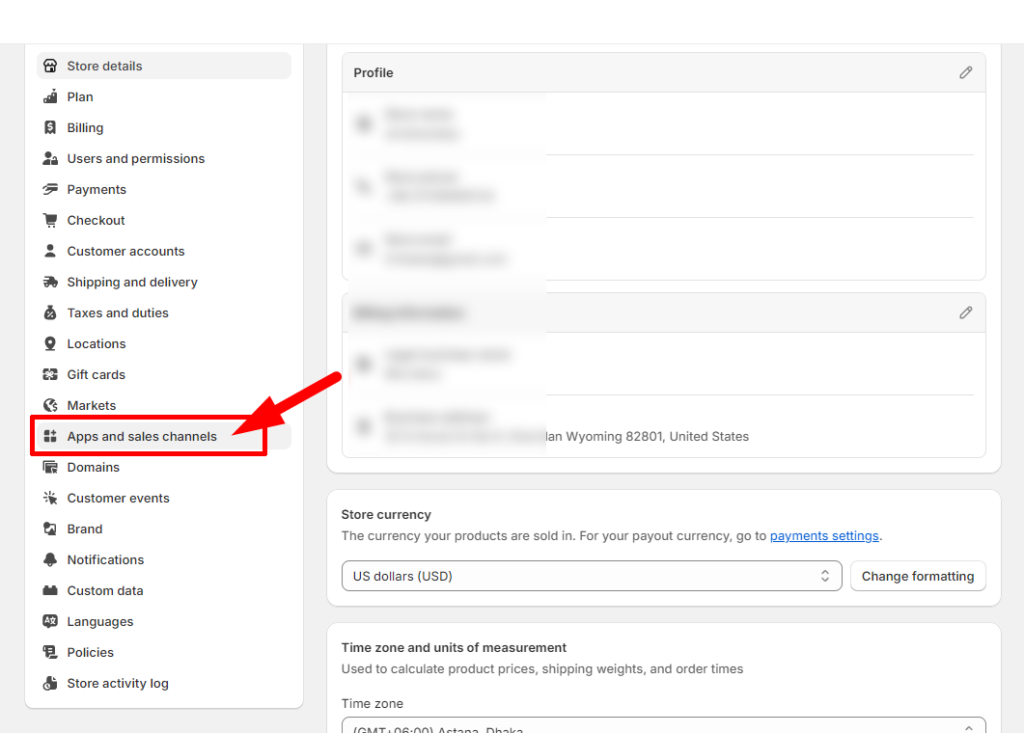
Step 06: Click on “Apps and Sales Channels.”
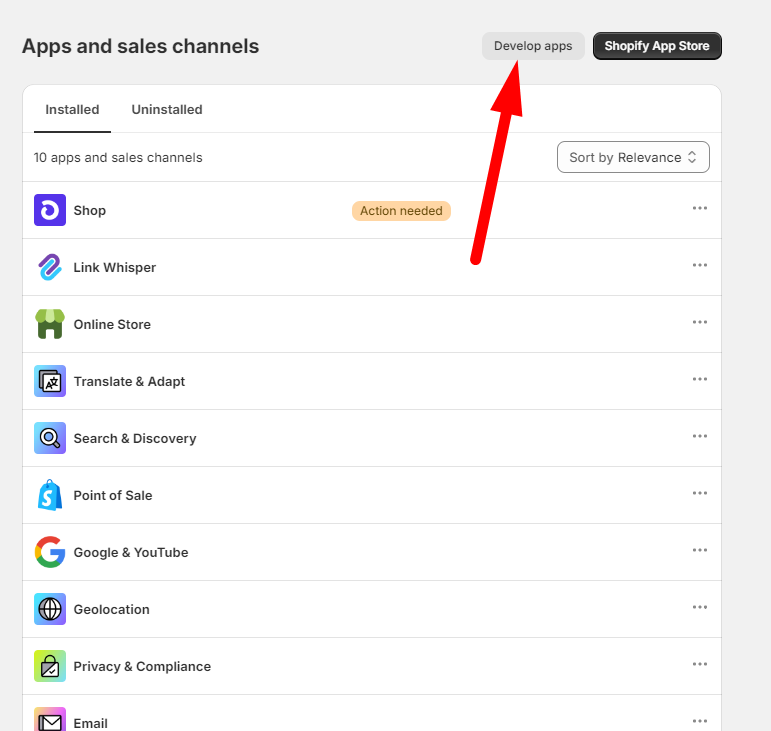
Step 07: Click on “Develop Apps.”
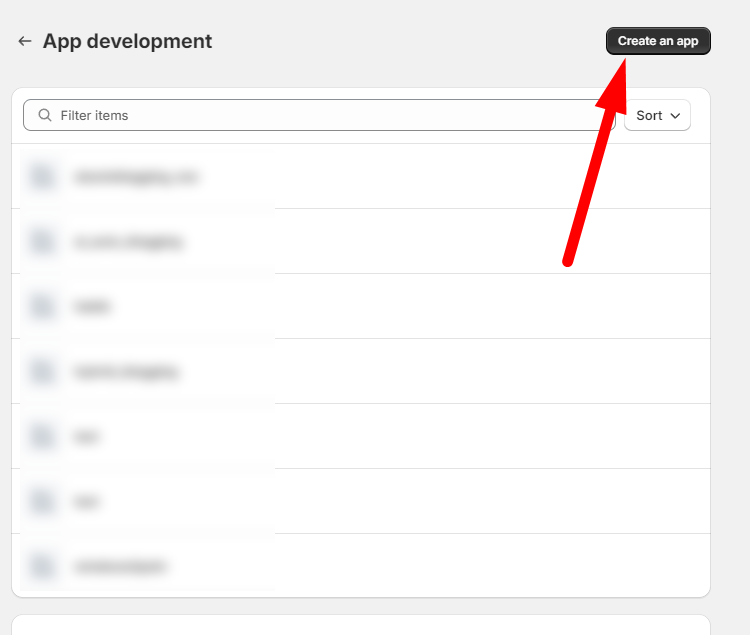
Step 08: Click on “Create an app.”
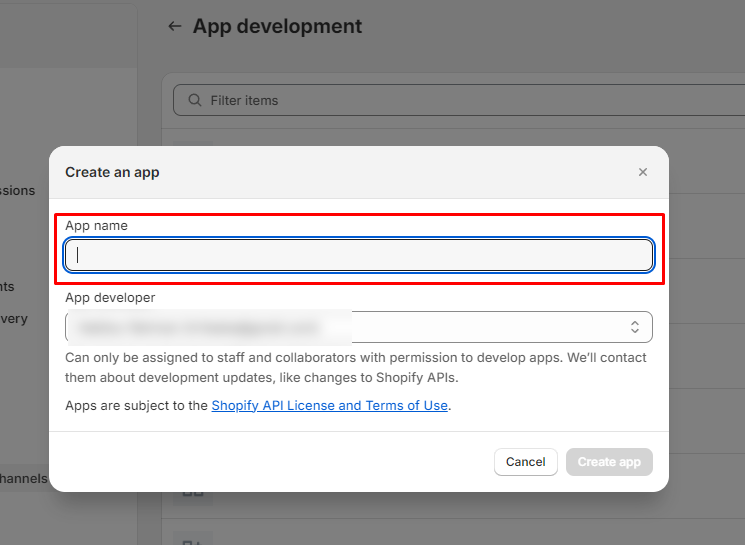
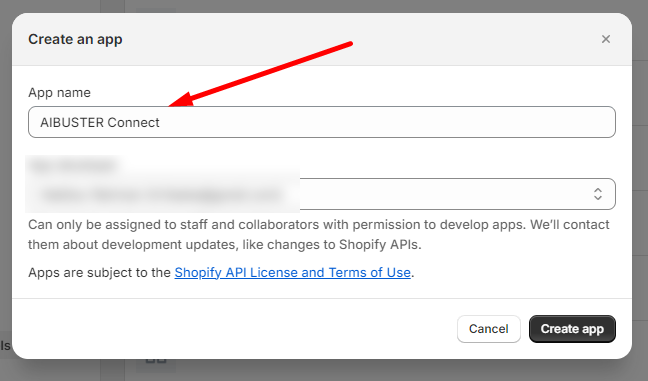
Step 09: In the App name box, you can give any name. For example, I used “AIBUSTER Connect” as a sample.
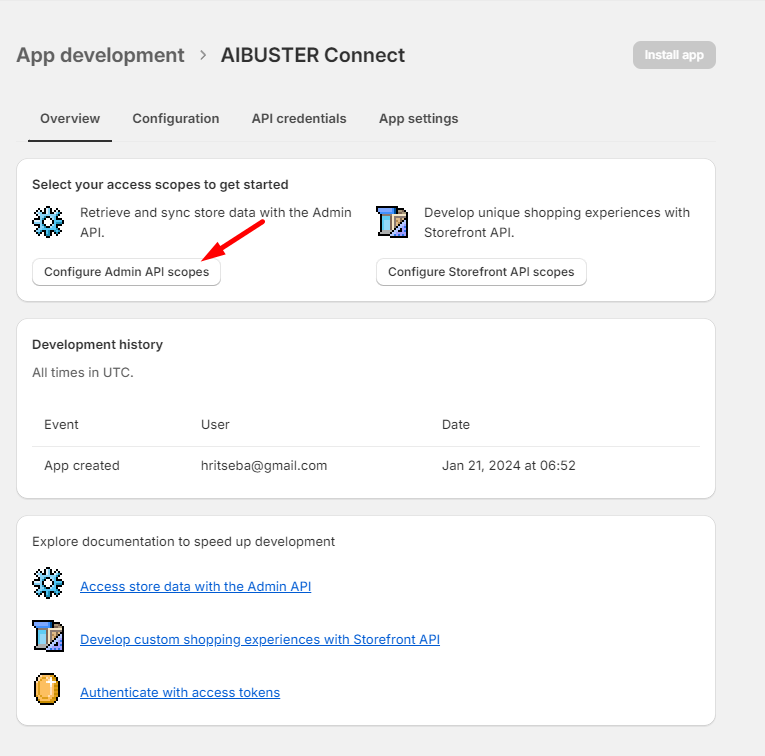
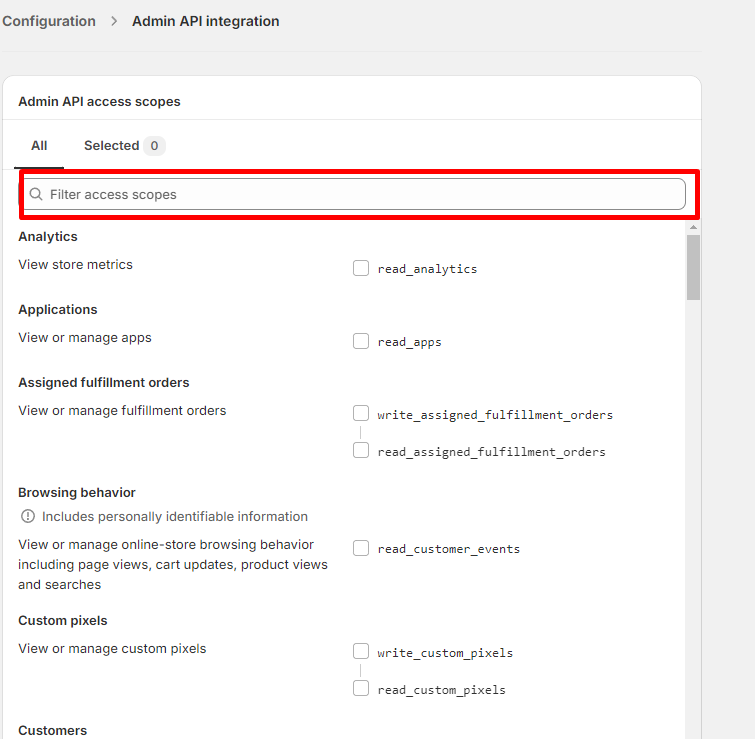
Step 10: Click on “Configure Admin API scopes.”
Step 11: Type in the “Filter access scopes” field.
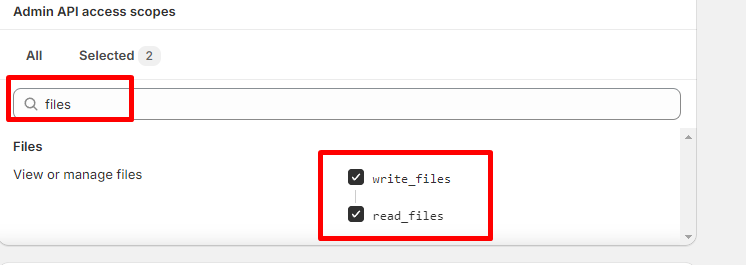
Type “files” and then click on the checkboxes for “write_files” and “read_files.”
Next, search for “content.”

Click on the check marks for both boxes related to “content.”

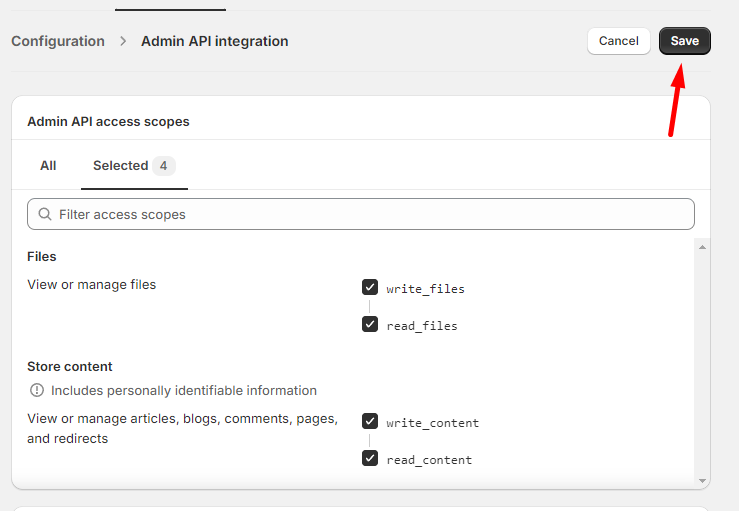
Step 12: Click on the Save button.
Note: Ensure that in the SELECTED box below, you have checked a total of 4 permissions.
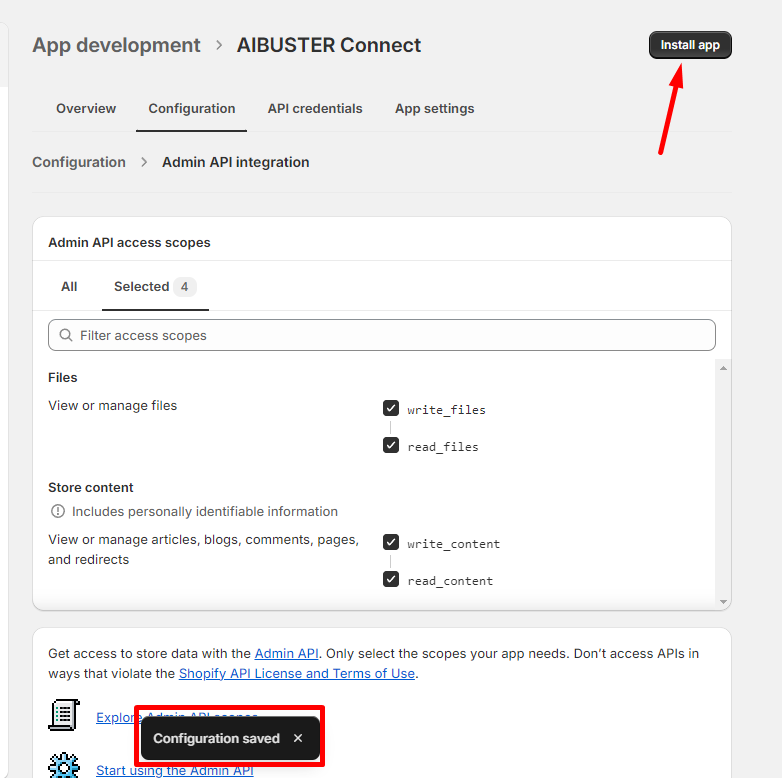
Step 13: After clicking the Save button, you will receive a “Configuration Saved” message. Then, click on “Install app.”
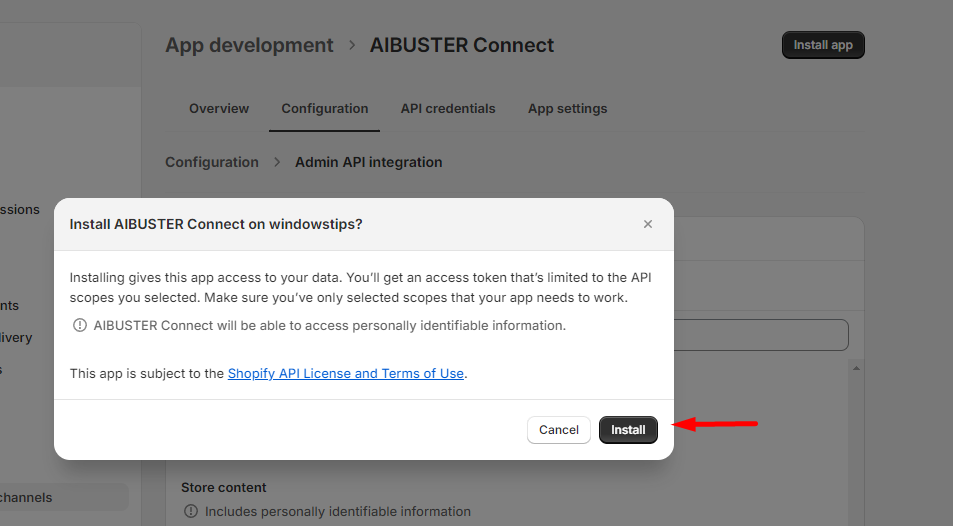
Step 14: If a dialog like the one shown below appears, click on Install.
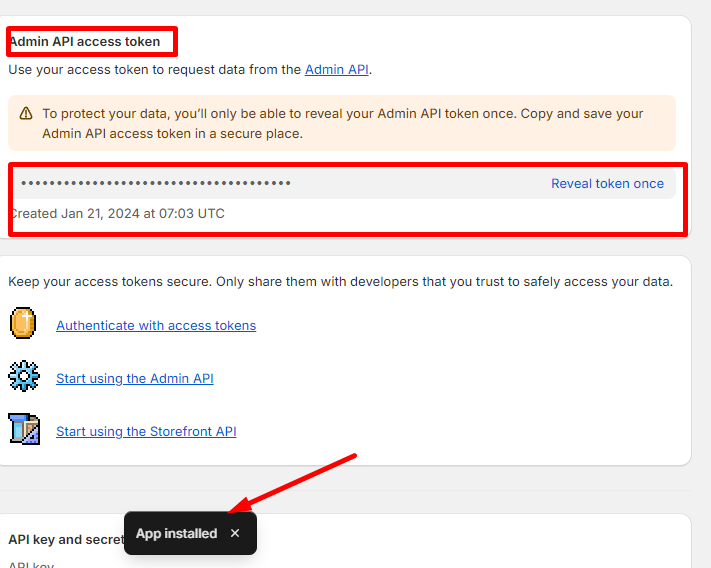
Step 15: After receiving the “App Installed” notification, you will be able to see your Admin API access token.
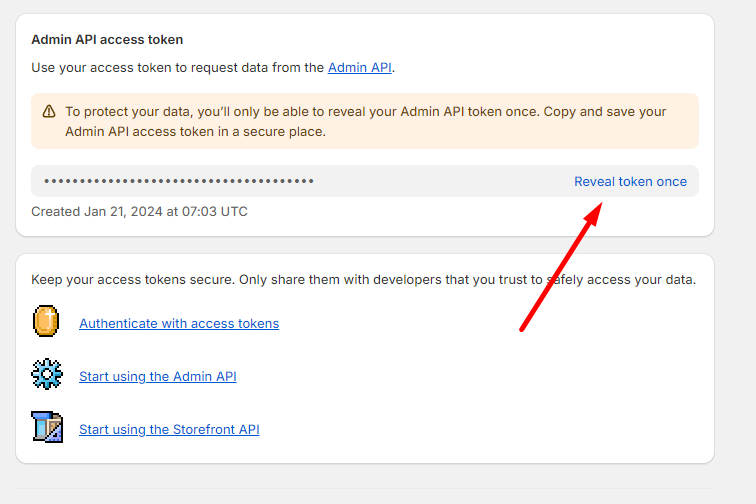
Step 16: Click on “Reveal token once,” and you will be able to see your token ID.
Admin API access Token ID
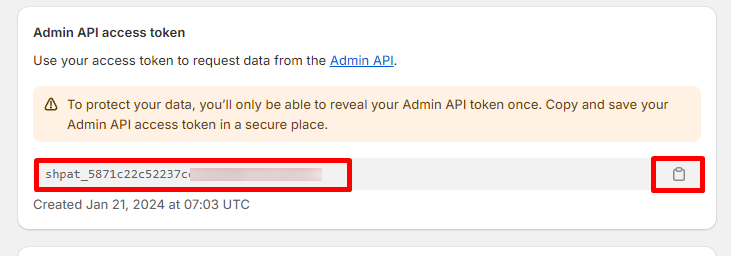
Note: You will only receive this API access Token ID once. Therefore, quickly copy and save it in a notepad as soon as you get it. Otherwise, you may face difficulties in reconnectingm. Or You should develop new app from beginning.
Now you have both the Store Name and Admin API Access Token ID. You can successfully connect with the AI Buster tools by following the above instructions.

If you still face any issues connecting your store, feel free to message us on our live Chat or Facebook page.


