How to Connect Your WordPress Website to AI Buster Tools
I want to extend my sincerest congratulations to all users on behalf of AI Buster. We have received numerous reports regarding credit deductions without receiving the requested articles or posts that appear to be running but do not show up. These issues are primarily a result of our failure to establish proper connectivity between our AI Buster tools and the WordPress website. To address this, we have prepared a comprehensive guide to help users properly connect their websites to our AI Buster tools. Without further ado, let us begin.
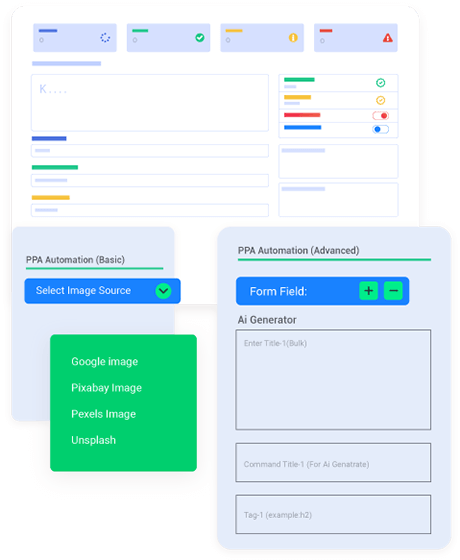
Publish like a pro with the No.1 AI bulk content writing tools!
Experience unparalleled efficiency and exceptional quality with the industry-leading Al Bulk Content Writing app.
Guidelines for Connect Your Website
The AI Buster How-To Module offers an efficient and user-friendly way to generate and publish bulk articles for your website.
List of mistakes that I’ve figured out till now:
- Usage of slash (/) at the end of the website URL.
- Using the website passwords instead of the app password.
- Disabling app passwords with website security plugins.
- Blocking 3rd party apps on the website in the hope of increasing its speed using cache plugins.
NB. Please consider that when conducting tasks outside the website, such as bulk posting, direct posting, direct image uploading, or automation, all of these actions are performed through REST APIs. In order to establish a seamless connection to our REST API, it is necessary to keep REST API settings open.
How to connect your WordPress website to AI Buster Tools?
We will learn the appropriate method of establishing a connection between your WordPress website and AI Buster Tools through a systematic, step-by-step approach.
Step 1: Firstly, identify the appropriate module from our tools in which you wish to post.
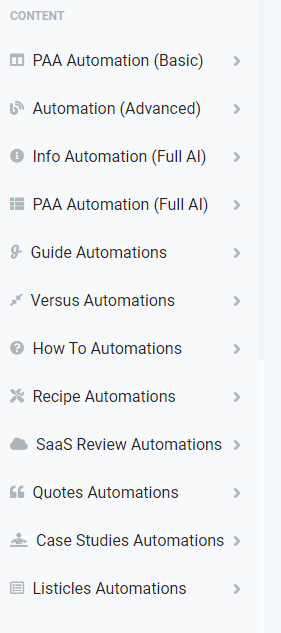
Step 2: Here, for example, I have chosen the (Info Automation – Full AI) module and selected the corresponding website option located underneath.
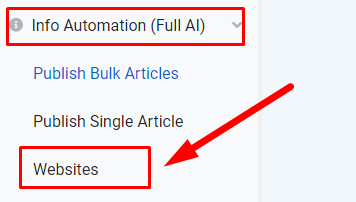
Step 3: Upon clicking on the website’s option, you will be presented with an interface resembling the one shown below.
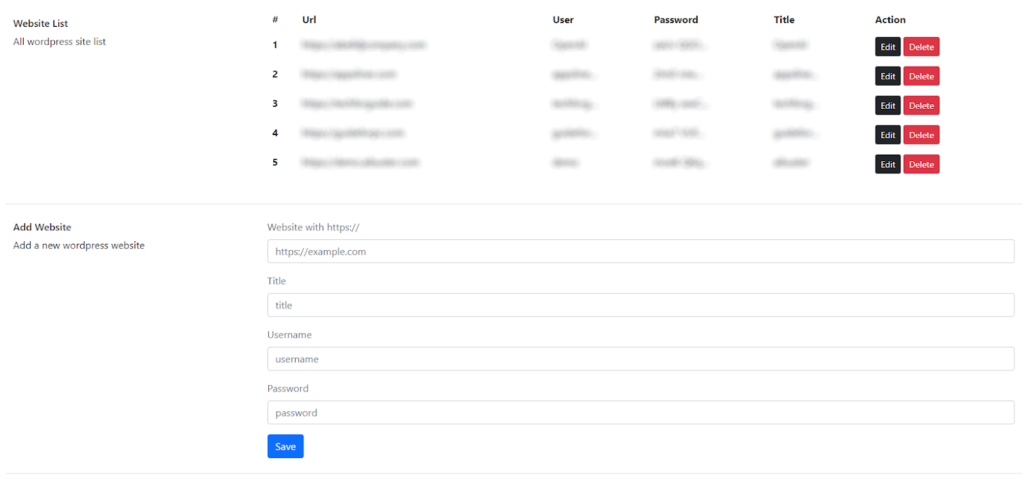
Step 4: Connect your website by accessing the Add Website section.

Step 5: There will be 4 Fields appearing on the screen; you must fill them in with the required information.

- Log into your website and go to the edit profile option.
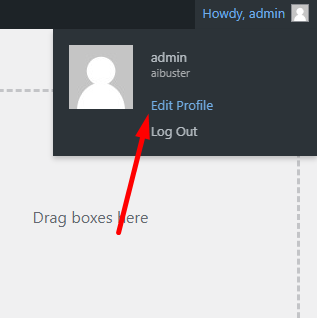
- Now scroll down and go to the “Application Passwords” option.

- You can create an application password by providing a name in the “new application password name” field. Once you have entered the name, click the “add new application password” button, and your app password will be generated within a few seconds. The password will appear below and resemble the following format:

- Kindly copy the entire password and navigate back to the AI Buster application. Proceed to the “Add Website” section within the AI Buster Tools website menu and complete the form in its entirety, as previously outlined.
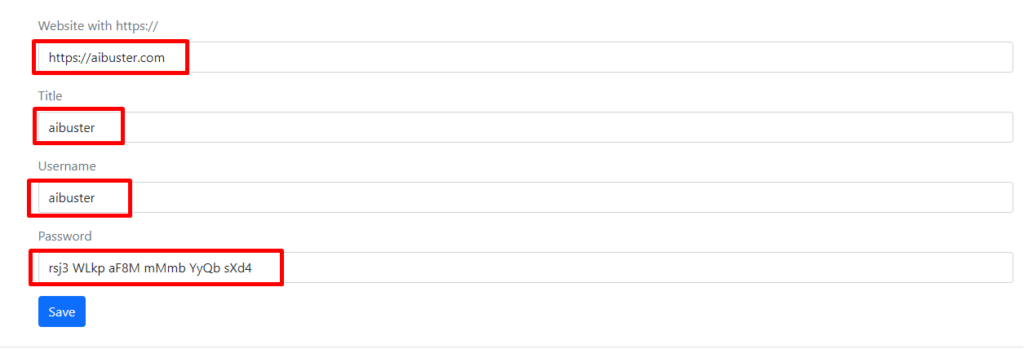
- We are pleased to inform you that your website has been successfully integrated with our AI Buster tool. As a result, you can now select your desired module and publish individual or multiple articles on your website easily.
Note: Several individuals encountered difficulties selecting a category due to improper connection to the website. To address this issue, we recommend watching our dedicated video on connecting to our website for further clarification. We hope this will help you the right way:
Connect Your Website – Using Guideline
During the trial phase of our AI Buster tool, you may encounter a variety of complexities. If you experience any issues, please post them in our group. Our dedicated support team will immediately resolve your issues.
Ready!
Try Before You Buy: Enjoy a 3-Day Free Trial Today!
Don’t just take our word for it – try AI Buster for FREE with our 3-day trial offer and experience the benefits for yourself.
200+ Reviews from Trustpilot & FB Page ★★★★★


