Dreaming big for your blogging site, but short on time? Wish you had a little robot churning out fresh blog posts while you sip margaritas on the beach.
Well, guess what? All that is possible with a simple trick– Autoblogging. And today, we’ll set up an autoblogging site with the largest content management system(CMS) – WordPress.
You don’t have to worry about RSS feeds, AI Buster is here for your content automation journey. For hosting stress, we’ll use Hostinger, which is great for professional hosting.
In this way, you can set up your own content-creating machine in MINUTES. No coding, tech wizardry or magic spells required.
We’ll also talk about automation tricks, and how to curate amazing content without sweating over writer’s block.
Let’s dive in and have your WordPress autoblogging website up and running in no time!
Create WordPress Autoblogging Website (Step By Step Guide)
First of all, creating a website requires a domain name, and a solid hosting option. After clearing the domain and hosting hassle, we’ll move to WordPress part, and autoblogging. So, let’s begin!
Step 1: Choose a Hosting
Now, the first part of the step is to have a Hostinger account. With Hostinger, you can get the top-notch domain and hosting services at the most affordable prices possible.
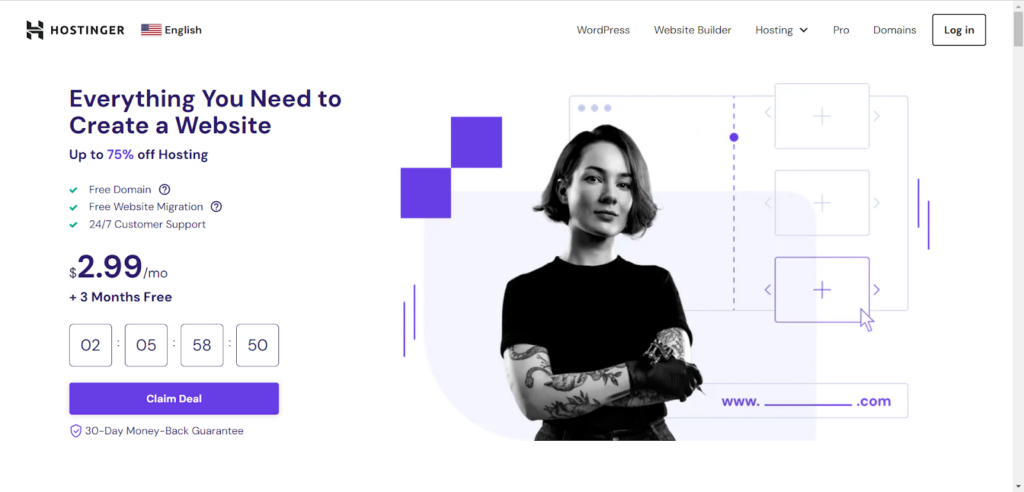
They do have that quality to back it up as well. The buying process is simple. Pick a plan, select the hosting period, add your payment options, and do the payment.
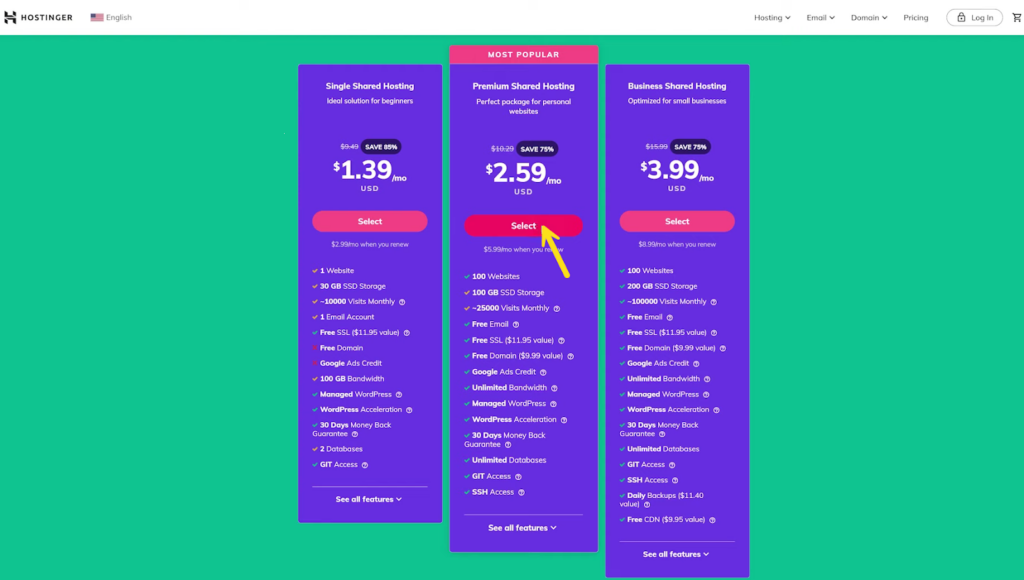
After that, you will receive an email with further login info. Now, we’ll login to the Hostinger account and select our domain name.
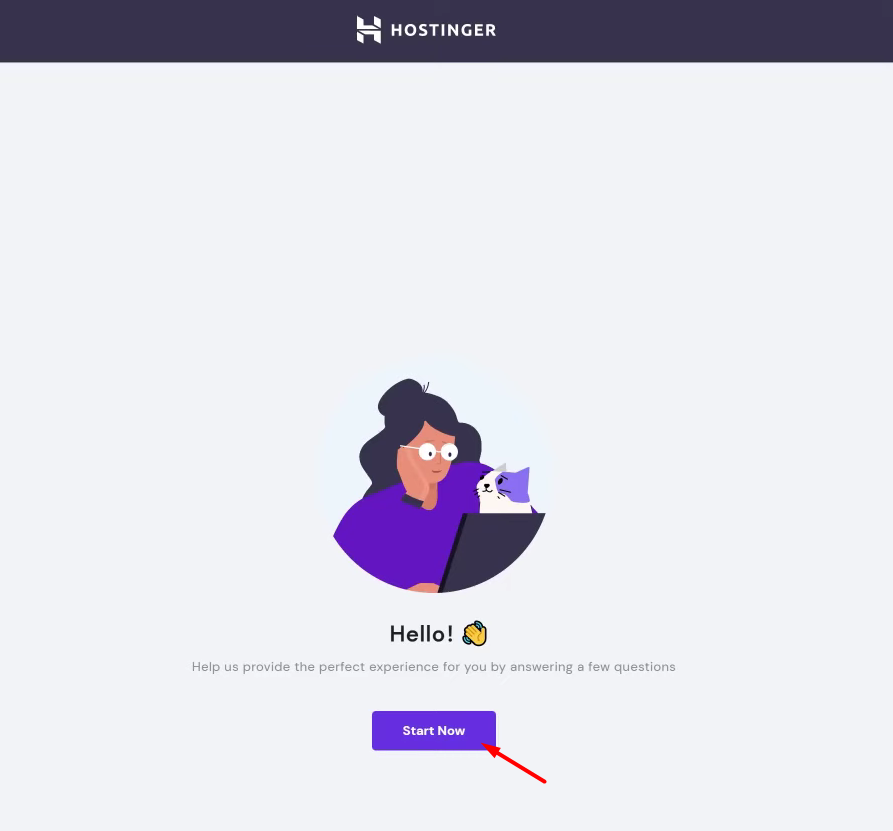
Okay, for the first time when you login to your account, this Hostinger WordPress setup will appear.
Step 2: Create and Add Domain To WordPress
In the setup page, click “Start Now” and choose if you’re building a brand new website or migrate one.
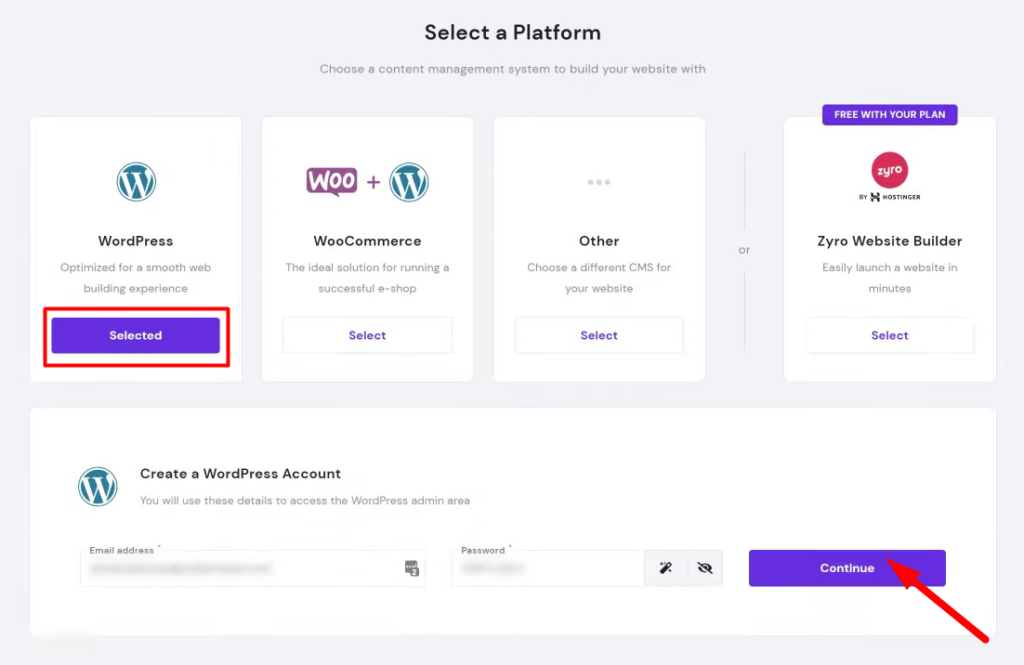
We’ll start with a new one. So, just select WordPress, give your admin username/email and password. Then, click “Continue” to create your administrative account.
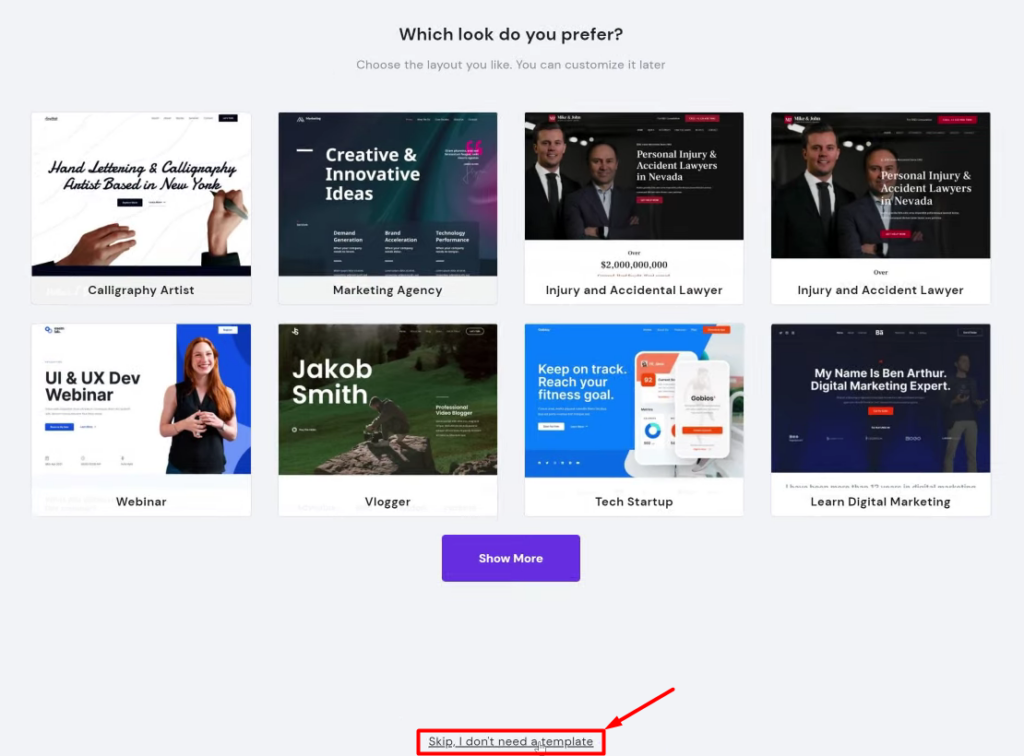
Now, skip the templates section, we’ll discuss it later. After that, choose if you’ll use a new domain name or an existing one. This is where domain name registration comes in.
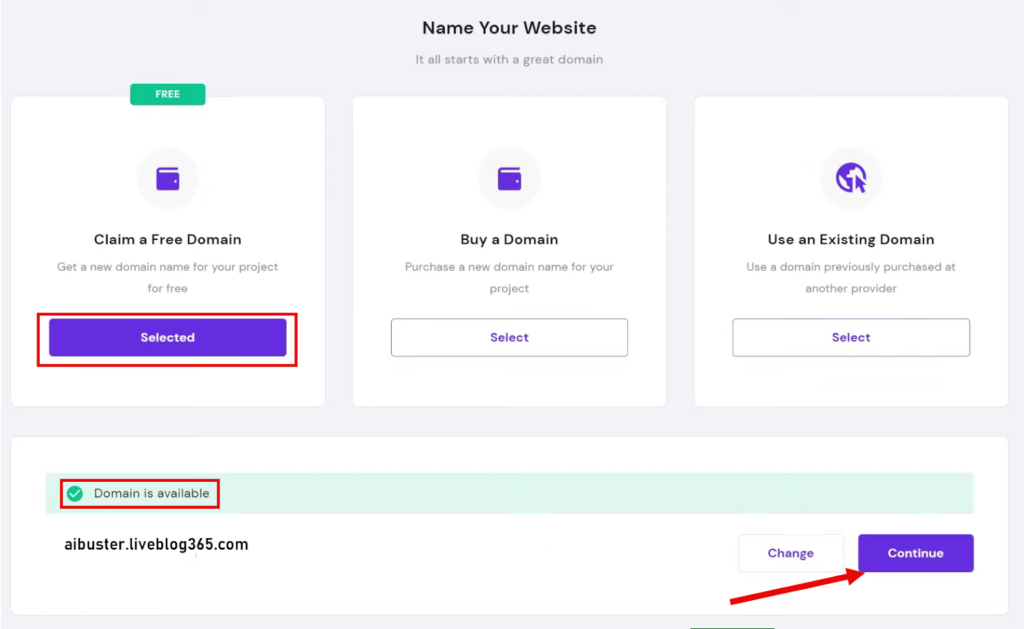
Just type in your wanted name and extension, and Hostinger will check the domain name with the database whether this combo is available or not.
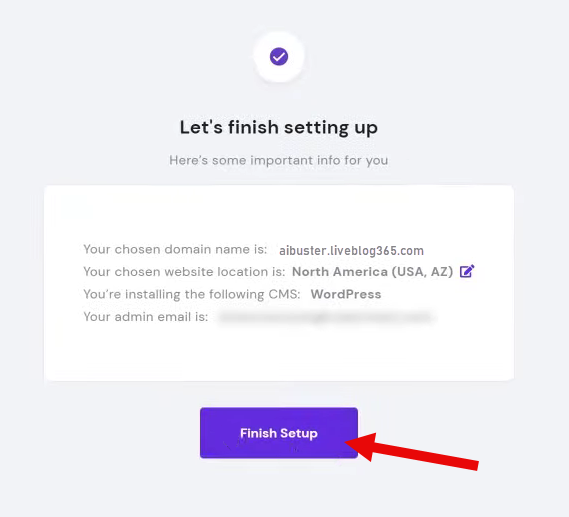
If it’s already taken, you’ll be suggested with a different combo. Once you find the name you want, register your information by clicking the “Finish Setup” button.
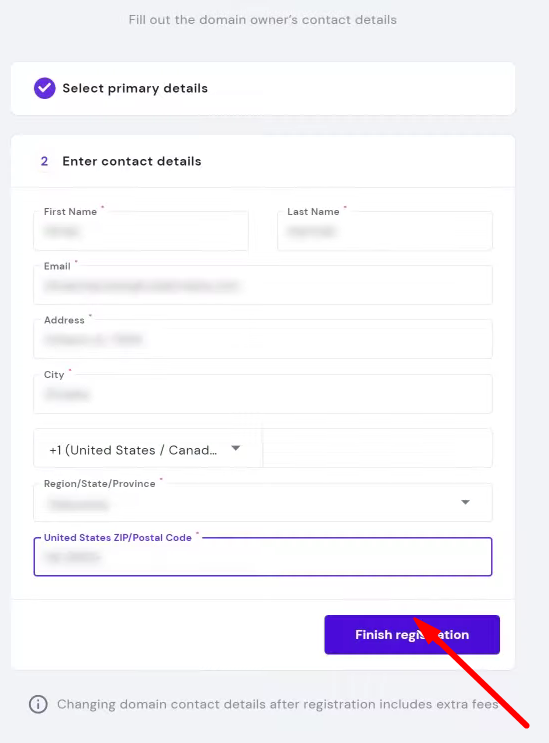
Then, check all the data, and confirm your site name by clicking the “Finish Registration” option. Wait for Hostinger to set everything up automatically.
Step 3: Login To WordPress Dashboard
If you’ve successfully registered your domain on WordPress, you’ll see a page like this with a Congratulations message.
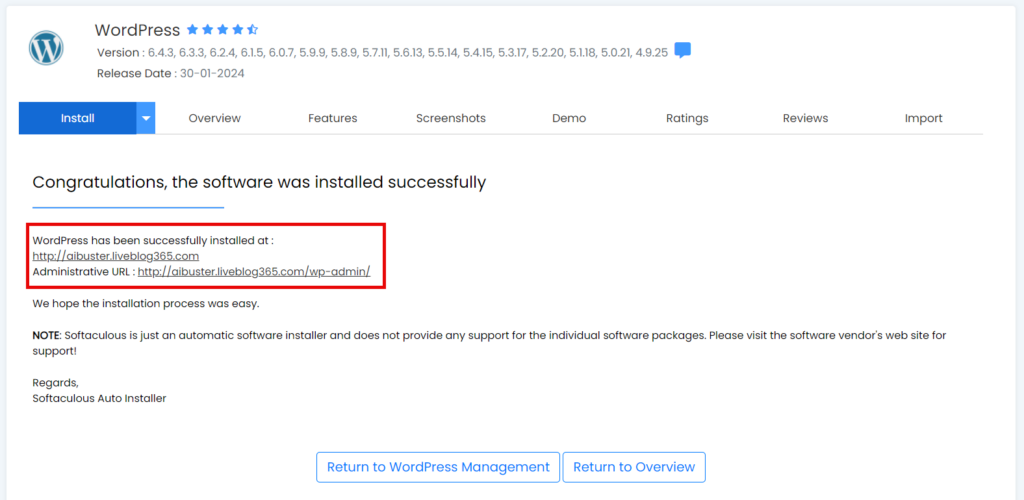
Here, you can find out your final domain, and the Admin URL to log in your WordPress Dashboard for further tasks.
Now type your site domain/wp-admin on a browser to access your WP Dashboard. Enter your username, password, and click “Log In” to proceed.
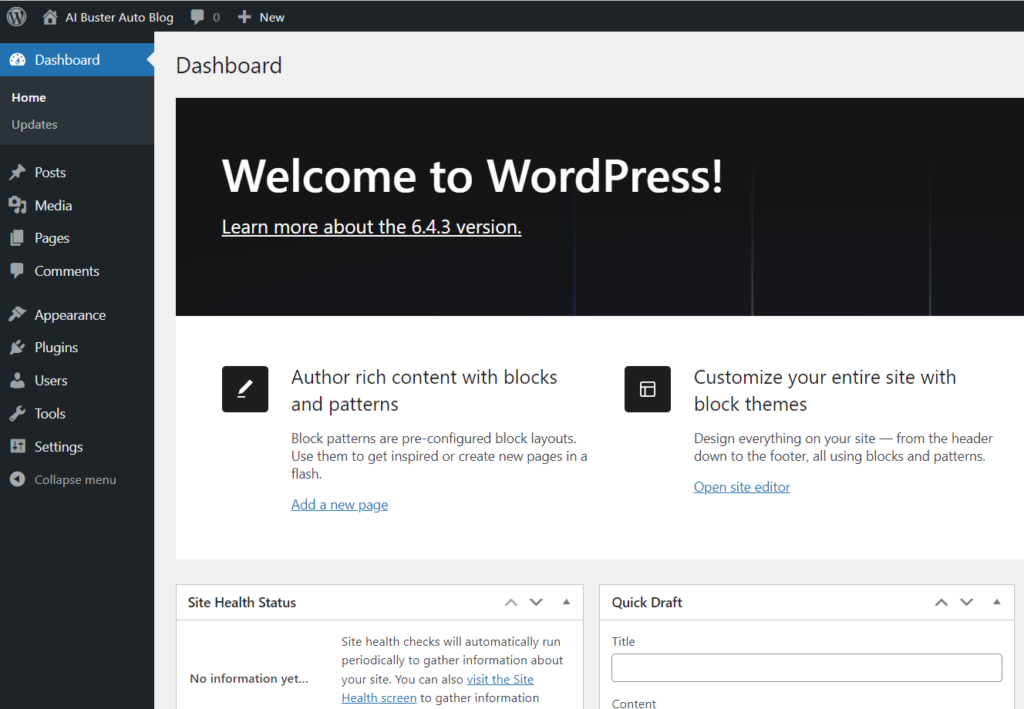
This is how your WordPress Dashboard will look like. Now that we’ve done with WordPress login, it’s time to customize your new website.
Step 4: Setup Themes And Plugins
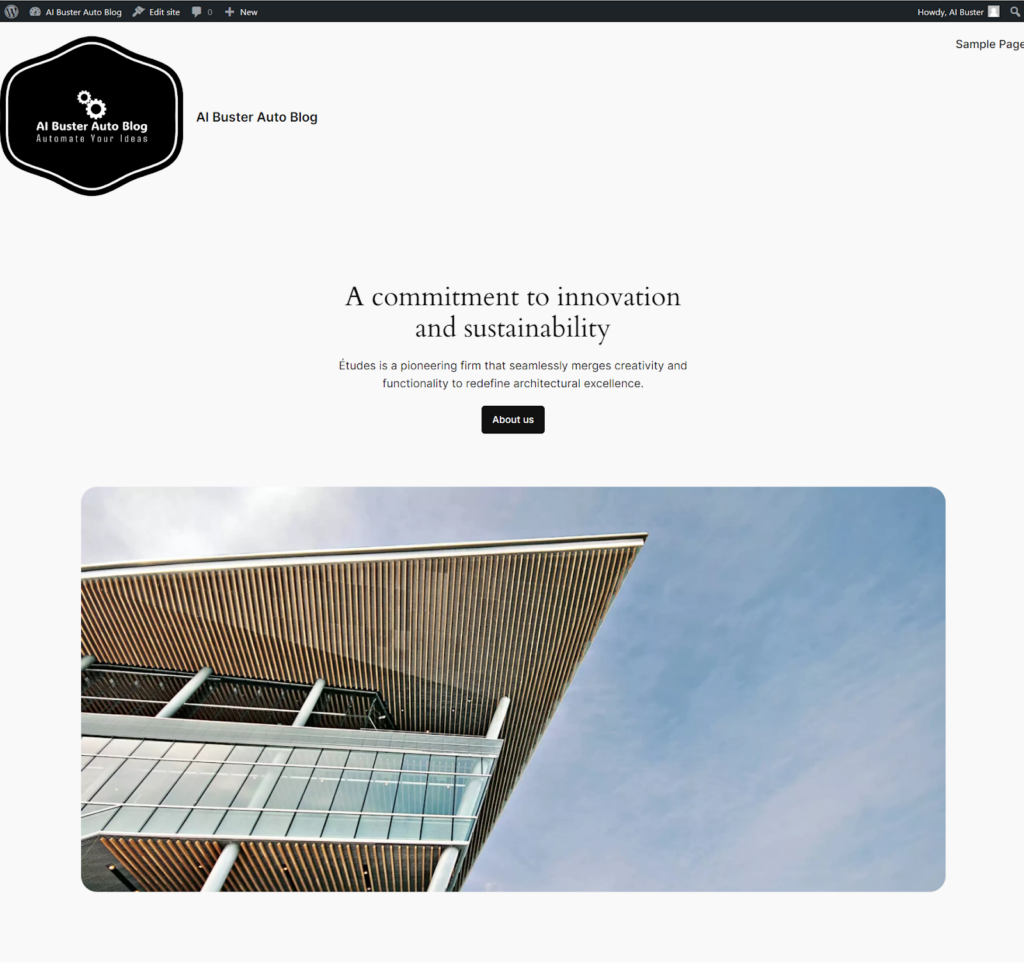
After the initial setup and installment, your WordPress website is now in the sample or default themes. You can have a live view of the sample design:
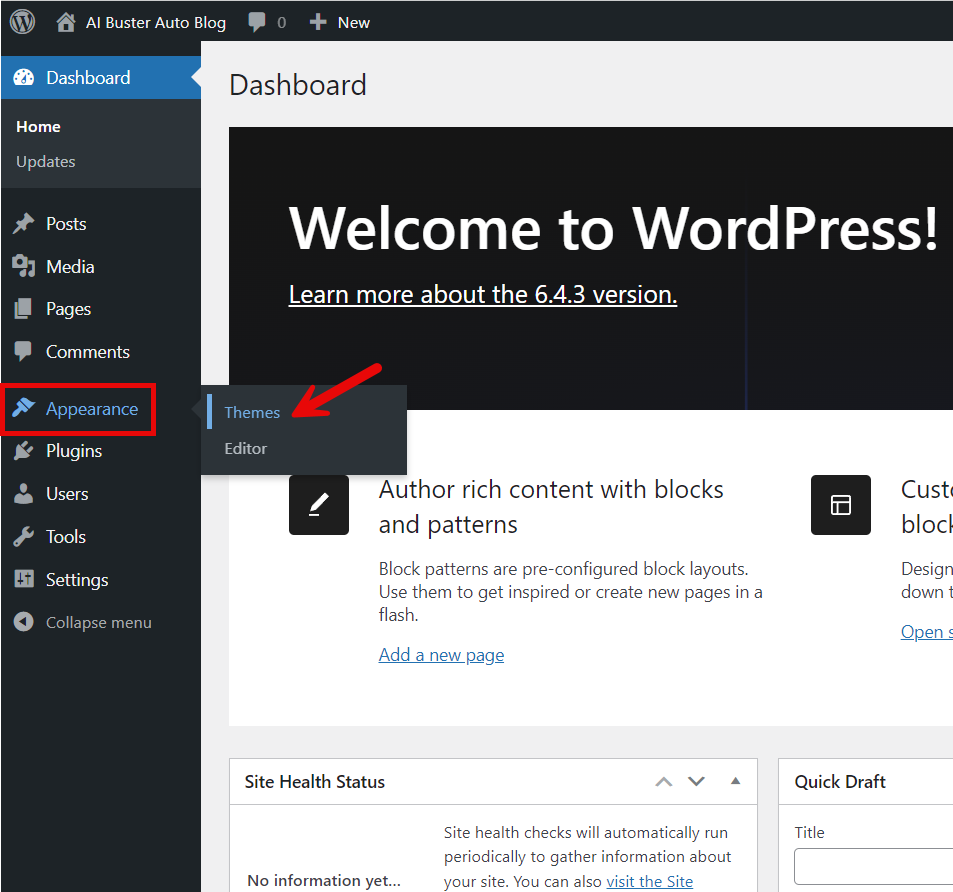
To give it a better and modern look, we need to use a theme. From your WordPress Dashboard, click “Appearance” and then click “Themes” to see the current themes.
These are the installed themes of your WordPress site. To add a new theme, click on the “Add New Theme” option.
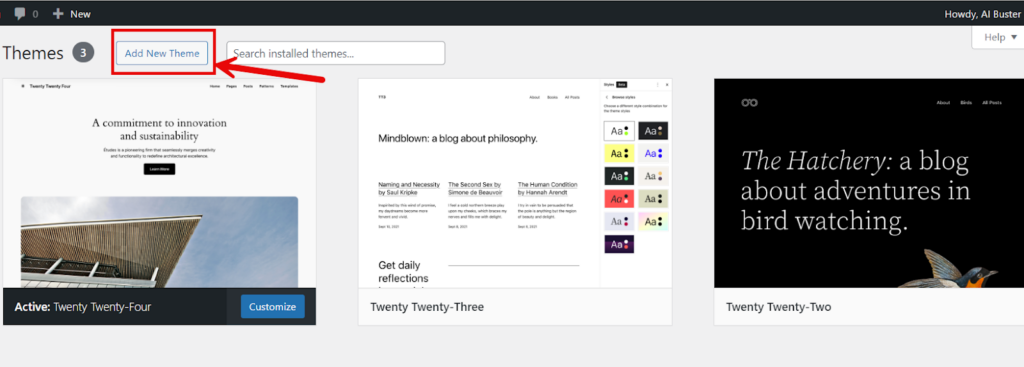
It will take you to a new page, where you’ll see new themes. For this guide, we’ll use the “GeneratePress” theme.
So, go to the search bar, and type “GeneratePress” and the theme will appear in the results. You have to install the theme to use it. So, click the “Install” button and let it install successfully.
After a successful installation, click the “Activate” button for the theme activation. It will be successfully added to your site after activation.
Now if you want you can have a look at the current theme(GeneratePress) from the live view. Just refresh the previous homepage.
This is what it looks like. If you want to customize it, you can go to the “themes” directory, and click the “customize” option for further fine-tuning. We’re done with themes. Let’s move to plugins!
Now, we’ll install the “FancyPost ” plugin to display our site posts in girds. It’s a great plugin from Pluginic for blocks and grids. So, click “Plugins” and “Add New Plugins” from your Dashboard.
Type “FancyPost” in the search bar, and the plugin will appear right on top. Then, click “Install Now” to install it.
After successfully installing, the button will be replaced with “activate.” Click on the button to activate the plugin. Now, let’s get into the content automation part!
Step 5. Connect With AI Buster
AI Buster is an AI-powered content generation tool which is capable of generating up to 1000 articles in one simple click.
To automate the content production for the WordPress autoblogging site, we’ll incorporate AI Buster. For that, visit www.aibuster.com, signup, and purchase your preferred plan.
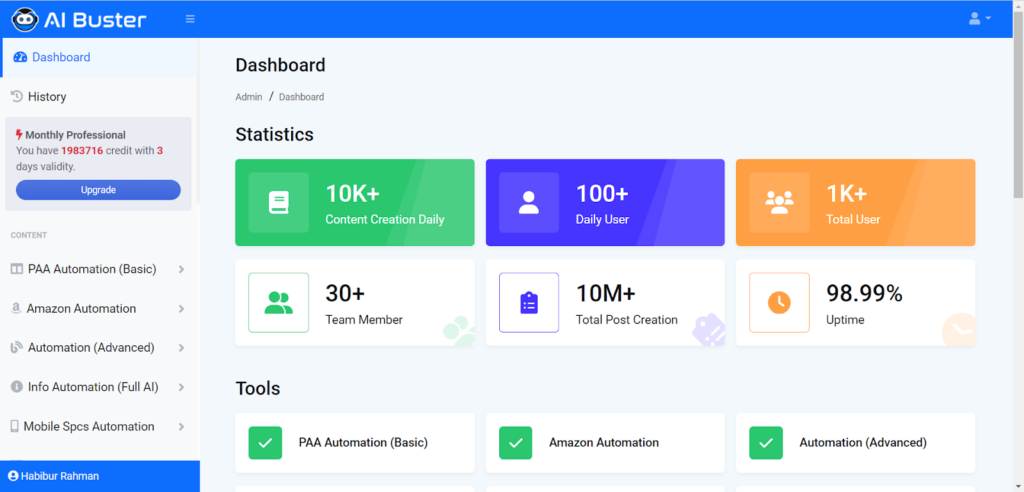
After signing up and purchasing, you’ll see a Dashboard like this. To connect your WordPress site to AI Buster, scroll down the left sidebar, and click “Websites” from the settings menu.
Then, open another tab and go to your WordPress Dashboard. Here, navigate your mouse pointer to the right top corner of the page, and click on the “Edit Profile” option.
In the new page, scroll down until you find the “Application Passwords” section. Type the new application password name, and click on the “Add New Application Password” button.
It will instantly generate a new password, which you can use for integrating your WordPress website to AI Buster. Copy the new password and click the “Update Profile” button.
Now go to the “Website” section of AI Buster Settings menu. Choose your website type, add the site URL, username, title, paste the copied password, and click “Save” to continue.
If you want further guidance on connecting your WordPress website to Ai Buster, check out this content.
Step 6: Generating Blogs Automatically
Now that we’ve successfully added Ai Buster with the WordPress site, it’s time to generate content automatically with AI Buster magic.
Ai Buster has multiple modules for article generation: PAA Automation, Amazon Automation, Info Automation, Versus Automation, How To, Recipe, and SaaS Reviews Automation.
We’ll start our blog automation with the PAA Automation(basic) module. So, click the module, and choose the “Publish Bulk Article” option.
To generate content, enter Keywords in a separate line. You can input up to 1K Keywords at a time for bulk automation. Choose the “GPT” model you prefer.
Give customized information for the tool to generate content for you. Here, you can choose the image source, image count, caption, videos, languages, etc.
You can set the article length in sections. After that, choose the post type, select your website, post status, the scheduling option if you prefer. Lastly, click “Submit” and you’re done.
Here, we’ve entered 5 keywords just for the demo. In the top status bar, you can check the updates of the submitted keywords, remaining ones, success, and much more.
We’re all done with our new WordPress autoblogging website!
Amazed with the features and efficiency of AI Buster? Want to be a part of the online success where thousands of people are thriving with AI Buster automation?
Conclusion
You have successfully created an autoblogging site with AI Buster that automatically generates and publishes content with advanced AI technologies.
This is how you can create a WordPress Autoblogging website within a few minutes with AI Buster. In this way, you can save time, and money for your content creation process.
Since AI Buster generates SEO optimized and plagiarism-free content, you don’t have to worry about copyright issues. It means your content is ready for publishing.
If you want to enhance your website traffic, generate revenue, and boost your ROI, you can give AI Buster a try!

